Claude Code · JUN 1, 2026
Generate images and video from Claude Code with the Higgsfield MCP
Wire Claude Code to Higgsfield, chain a still into a cinematic clip in one prompt, freeze it into a reusable skill, and put it on a trigger.
Higgsfield has an MCP server, which means Claude Code can generate images and video for you without you ever opening their app. You describe what you want in plain English; Claude picks the model, fires the job, and hands back the file. The fun part is chaining it: one prompt that makes a still, then animates that exact still into a cinematic clip.
Below I wire it up, run a real image–to–video chain end to end, then show how to freeze that chain into a reusable skill and put it on autopilot. The image and the 3-second clip further down were both generated live while writing this — no stock, no edits.
Connect Claude Code to Higgsfield
There are two ways in. The MCP route is one command and is what I use, so start there.
Add the MCP server
The Higgsfield MCP server lives at https://mcp.higgsfield.ai/mcp. Register it with Claude Code over HTTP transport:
claude mcp add --transport http --scope user higgsfield https://mcp.higgsfield.ai/mcp
Authorize with OAuth
The first time Claude calls a Higgsfield tool, it opens a browser for OAuth. Sign into your Higgsfield account, approve, and come back to the terminal. No keys to paste, no env vars to manage.
Verify it's live
Check the server registered and authenticated:
claude mcp list
# or, inside a Claude Code chat:
/mcp
You should see higgsfield listed and connected. That's it.
What you can do once it's connected
The server exposes a catalog of image and video models behind a handful of tools. You don't memorize model IDs — you describe the goal and Claude picks one, or you name the model and it obeys. The headline capabilities:
- Generate images — GPT Image 2 (OpenAI), Nano Banana Pro (Google), Flux 2, Seedream, and Higgsfield's own Soul models for consistent characters. Text-to-image or image-to-image, up to 4K.
- Generate video — Kling 3.0, Seedance, Veo, and others. Text-to-video or image-to-video, with multi-shot and audio on the newer models.
- Use a reference — feed an uploaded file, a URL, or the job ID of a previous generation as the input for the next one. That last one is what makes chaining trivial.
- Check cost first — every generation can be preflighted for its credit cost before it runs, and you can check your balance any time.
Because a finished job's ID can be the input to the next job, you can build a pipeline in a single sentence. Which is the whole point.
Chain it: one prompt, image to video
Here is the exact prompt I gave Claude Code — plain English, no tool names, no IDs:
Write a prompt to generate a high-def picture of a basketball on a court in NYC, then feed it to chatgpt-image-2 in Higgsfield at 16:9, then animate it with Kling 3.0, 3s at 1080p. Make it cinematic.Claude did three things from that one line. First it wrote a real image prompt (the “chatgpt-image-2” I asked for maps to GPT Image 2 in the catalog) and generated the still at 16:9, high quality:
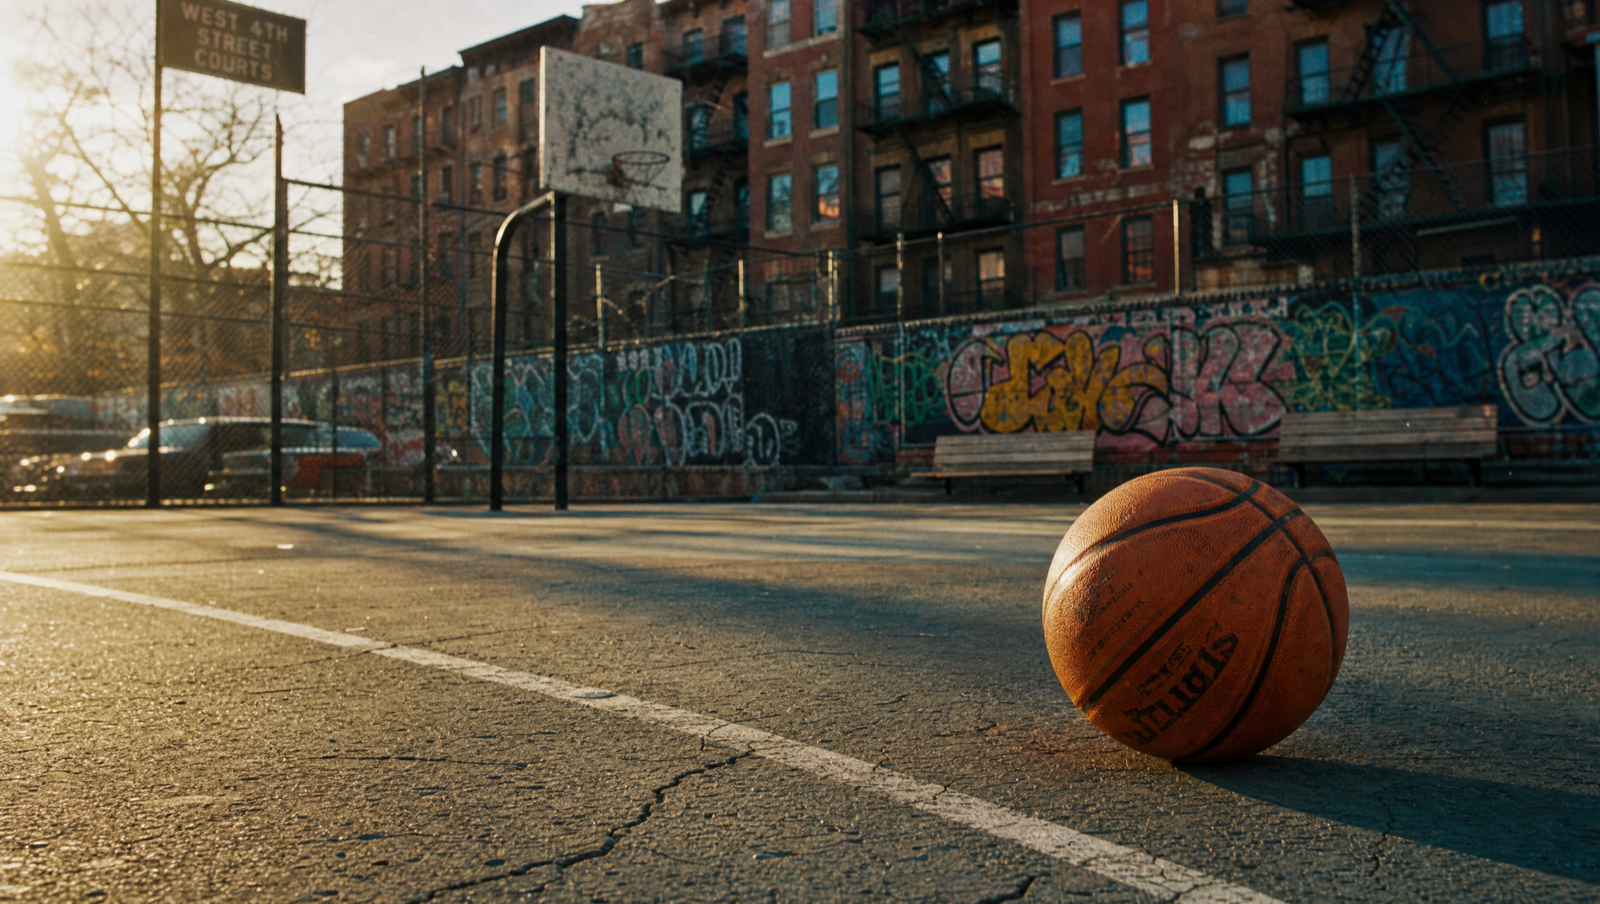
Then it took that image's job ID, passed it as the start frame to Kling 3.0, and rendered a 3-second clip at 1080p with a slow cinematic push-in:
Under the hood it was two tool calls. The image prompt Claude wrote was more specific than my one-liner — that's the model doing its job:
A high-definition photograph of a single orange basketball resting on a weathered outdoor New York City public basketball court. Cracked asphalt with faded free-throw line paint, a chain-link fence, and behind it classic NYC brownstones, fire escapes, and a graffiti mural. Warm golden-hour light, long soft shadows, shallow depth of field with the ball in crisp focus, subtle film grain, photorealistic, cinematic color grade.

model: gpt_image_2 · aspect: 16:9 · resolution: 2k · quality: high
And the animation step, fed the image job ID as its start frame:
Cinematic slow dolly push-in toward the basketball on the NYC court. Subtle handheld micro-movement, shallow depth of field, golden-hour light shifting across the asphalt, faint dust and heat haze, atmospheric and filmic. The ball stays still; only the camera and light move.

model: kling3_0 · start_image: <image job id> · duration: 3 · mode: pro (1080p) · aspect: 16:9Save the chain as a skill
Running that by hand once is a demo. The real win is freezing it into a skill so the whole image–to–video pipeline becomes one command. A skill is just a folder with a SKILL.md that tells Claude what to do. Drop this at ~/.claude/skills/image-2-video-hg/SKILL.md:
---
name: image-2-video-hg
description: >
  Turn a one-line idea into a cinematic clip with Higgsfield. Generate a
  high-def still with GPT Image 2, then animate that exact still with
  Kling 3.0. Use when the user wants an image-to-video render, a "make it
  move" clip, or names this skill.
---

# image-2-video-hg

Given a subject (and optional aspect ratio, duration, mood), do this in order:

1. Write a vivid, specific image prompt for the subject. Default to a
   photorealistic, cinematic look unless told otherwise.
2. Generate the still with Higgsfield: model gpt_image_2, the requested
   aspect ratio (default 16:9), resolution 2k, quality high. Wait for it.
3. Take the finished image's job ID and animate it: model kling3_0,
   start_image = that job ID, duration = requested seconds (default 3),
   mode = pro for 1080p, a cinematic camera move in the prompt. Decline
   any preset so the literal prompt wins.
4. Return the image and the video, and report credits spent.

Defaults: 16:9, 3s, 1080p, cinematic dolly-in. Always preflight the video
cost if the user mentions budget.
That's the entire skill. The description is what Claude reads to decide when to fire it, so make it match how you'd actually ask.
Invoke the skill to repeat it
Once the file exists, the four-step dance collapses into one line. Either call it by name or just describe the job — the description does the routing:
/image-2-video-hg a vintage motorcycle parked on a foggy Tokyo street at night, 16:9, 4sClaude writes the prompt, renders the still, animates it, and hands back the clip — same pipeline, new subject, zero re-explaining. Run it headless from any terminal too, which is what makes the next part work:
claude -p "/image-2-video-hg a vintage motorcycle on a foggy Tokyo street at night, 16:9, 4s"
Automate it with a routine
The last step is taking your hands off it entirely — the skill runs on a trigger instead of on you typing. Two flavors, depending on what “trigger” means.
Time-based: a scheduled routine
Claude Code can run skills on a cron schedule as a routine. Good for “every morning, make me a fresh clip from today's theme.” You set it up conversationally:
Create a routine that runs /image-2-video-hg every weekday at 8am with the subject from the top row of my "daily prompts" sheet, and DMs me the clip.Event-based: new image in Google Drive
For “whenever a new image lands,” you want an event trigger. The clean pattern: a watcher (Make or n8n) listens to a Google Drive folder, and on a new file calls Claude Code headless with the skill.
- Trigger: Make/n8n “new file in folder” on your Drive folder.
- Action: run
claude -p "/image-2-video-hg <file URL>, 16:9, 3s"on a small box or cloud function. - Output: the watcher drops the finished clip back into a Drive “rendered” folder and pings Slack.
Other triggers slot into the same shape: a webhook, a new Airtable row, an inbound email, a form submission. The skill is the unit of work; the routine just decides when to pull the lever.
That's the whole arc: connect once, describe what you want, freeze the good pipelines into skills, and let routines run them while you do something else. The basketball clip up top took one sentence. The second one took none of my attention at all.

Written by
@atareh
AI architect & creator. Writing, designing, and producing in AI and tech. Previously head of product at a healthtech SaaS; background in molecular science. Founded gogray.today in 2017.
Related
Keep reading.
Made by @atareh · x / twitter · instagram